Before the Gritter Arrives: A November Rust Audit for Ageing Vauxhalls

Photo: Achim Hering, CC BY 3.0, via Wikimedia Commons
November is the month when British roads change character. The leaves go, the gritters come out, and every stone chip and scabbed arch on a high-mileage Vauxhall starts its annual experiment with salt. If you own an Astra H, Corsa D, Insignia, Antara or a Chevrolet Captiva that you plan to keep, this is the month to get underneath it - not after the first white crust appears along the sills.
Rust is not a cosmetic issue on a twenty-year-old GM car. It is the difference between a £600 welding bill and a scrap weighbridge ticket. The good news is that most of the damage is predictable, and a few hours with a torch and a can of cavity wax can buy several more winters.
Start with an honest inspection
Pick a dry day and get the front end on ramps. A torch, a small screwdriver and a roll of paper towels are enough. Before you clean anything, look at the MOT history online for corrosion advisories - not to scare yourself, but to know where the tester was already looking. A fresh ticket with no advisories is useful, but it is not a rust-free certificate.
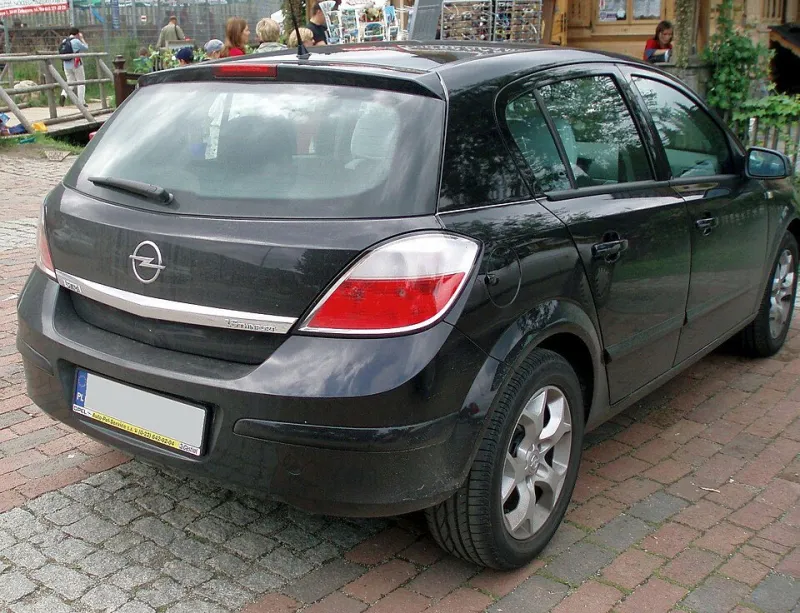
Work from the back forwards. Check the boot floor, spare wheel well, rear subframe mounts and the area around the fuel filler. On Astra H estates and hatchbacks, the rear arch lips are the classic trouble spot: mud sits behind the plastic liner, the lip bubbles, and by the time you see paint lifting there is usually a crusty edge underneath. Corsa D sills and jacking points deserve the same attention. On Antara and Captiva models, the rear subframe and its mounting points are the ones to inspect properly - especially on 4x4 cars that have seen farm tracks or coastal air.
Brake and fuel lines are just as important. They corrode behind plastic clips and under underseal that looks intact. Follow them with a torch and a gloved hand. If a line is scaly, plan to replace it rather than paint it.
The GM hotspots that actually bite
- Astra H rear arches: inner lip, arch liner screws and the fuel filler neck area.
- Corsa D and Insignia sills: jacking points, seam sealer and the inner sill behind the plastic trim.
- Antara and Captiva rear subframes: mounting points, trailing arm brackets and the chassis rails above them.
- Boot floors and spare wheel wells: water gets in through lamp seals, sunroof drains and tailgate rubbers.
- Front suspension turrets and inner wings: check under the bonnet and behind the arch liners.
- Anywhere fresh underseal is hiding flakes: if it feels soft or crunchy, investigate before you add more.
Be gentle with the screwdriver. You are looking for crisp metal, not creating a hole. If a prod goes through, you have found a welding job, not a waxing job.
Preparation beats product
The most common undersealing mistake is sealing over dirt, moisture or active rust. That simply gives the corrosion a warm coat. Wash the underside properly, degrease it, and let it dry for a full day. Remove loose scale with a wire brush or flap disc, treat light surface rust with a converter, and prime bare metal. Heavy, flaking rust needs cutting out and welding. Underseal is a preservative, not a structural repair.
If you are working outdoors in November, accept that you will need dry, mild conditions or a well-ventilated garage. Do not apply cavity wax to a wet car.
DIY cavity waxing
Cavity wax is the secret weapon here. It creeps into box sections, sills, doors and rear quarters where paint cannot reach. Buy an aerosol kit with a long flexible wand, warm the cans in a bucket of hot water, and wear old clothes, gloves and eye protection. Mask brakes, exhausts and rubber bushes.
Access the sills through drain holes and the rear arches with the liners removed. Feed the wand in, apply in short passes, and let the wax flash off between coats. A good rule is two thin coats rather than one heavy soaking. Bilt Hamber Dynax S50, Dinitrol ML and Waxoyl are all sensible choices for a DIYer. Expect to use four to six cans on a hatchback if you are doing sills, doors, arches and boot areas.
For floor pans and chassis legs, a proper underseal or stone chip coating is better than cavity wax. Cavity wax stays soft and self-healing; underseal gives a tougher outer layer. Use both, in the right places.
The professional option
A proper UK rust-proofing specialist will steam-clean the underside, inspect the known weak points, cavity-wax the box sections and apply a durable underseal. Budget around £300 to £600 for a thorough job on a hatchback or small SUV, and more if arch liners and undertrays have to come off. Welding is extra - typically £80 to £150 per patch, depending on access and how much metal has gone.
Ask for photographs before and after. Be wary of a £99 special that sprays black goo over a wet floor pan. A good specialist will tell you what they will not cover because it needs welding first.
Winter routine and the five-year plan
Once the car is protected, keep it that way. Rinse the arches and sills after salty drives when you can, fix leaking sunroof drains, and clear mud from behind arch liners. Check the wax annually and top up any thin areas. If you are keeping the car for another five years, a £150 DIY session or a £500 professional job is usually cheaper than replacing a solid GM car with an unknown replacement.
The gritters are coming. A dry Saturday now is worth more than a welding quote in February.